Creating a Scheduled Job
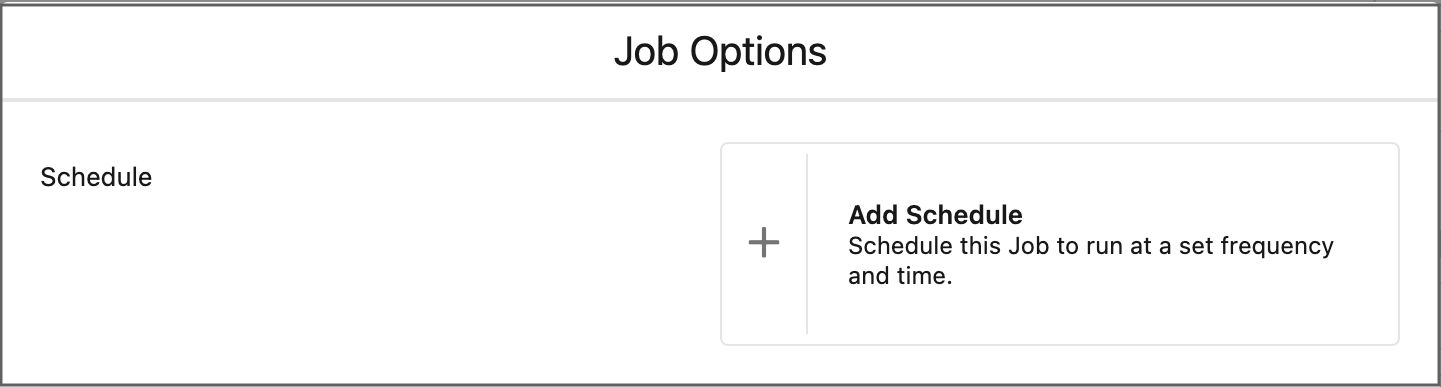
Create a Scheduled Job the same way as a single job, by clicking New Job on one of the Deduplicate Job Overview pages. At step 2. Job Options, click Add Schedule.
For detailed information on creating Deduplicate Jobs, see Deduplicate Job - Find Duplicates in Batch.
- Go to the Deduplicate Job tab.
- click the Down arrow
 next to the Job Overview header to switch to the Scheduled Job Overview.
- At top right, click New Job
 .
. - In the New Job modal, at step 1. Select Records, enter a Job Name, select an Object and add a Scenario.
If needed, add a Cross Object or a Filter. - Click Next.
- At step 2. Job Options, click Add Schedule.
- Select a Frequency: Daily, Weekly, Monthly, or Custom.
- Daily: select a preferred start time.
- Weekly: select one or more weekdays, and a preferred start time.
- Monthly: select a set day (e.g. the 2nd of each month) or a relative day (e.g. the last day or the last weekday of each month), and a preferred start time.
- Custom: enter a Cron String. See below for an explanation.
 If you've changed your mind and you do not want to use a schedule after all, click Remove Schedule
 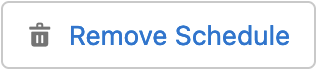 .
.
- Optional: Add Auto Merge or Auto Convert, and/or AI Match Recommendation.
- Click Next.
- Select a processing option: Salesforce, Plauti Desktop/Server, or Plauti Cloud. Note that costs apply for Plauti Cloud jobs.
Scheduled Jobs can only be processed via the Plauti Desktop app if you are also using Plauti Server. But as jobs can only run on Plauti Desktop when the app is open, it is recommended to use either Plauti Cloud, Plauti Server or Salesforce for scheduled jobs. - Click Schedule.
You are returned to the Scheduled Job Overview page or Deduplicate Job Overview page, depending on where you started.
- If you were returned to the Deduplicate Job Overview page, at top left, click the Down arrow next to the Job Overview header to switch to the Scheduled Job Overview.
- In the overview, find the scheduled job you just created, to check its details and apply job options if needed. See Scheduled Job Overview.
Make sure the job's status says Active if you want it to start at the first upcoming moment according to its schedule.
Each time when a scheduled job should run according to its schedule, a new Deduplicate job is created and listed on the Deduplicate Job Overview page. If it was set to be processed in Salesforce or Plauti Server, it will run automatically. Jobs for Plauti Cloud need to be started there first, or are started automatically if Auto Run is enabled.
On the Deduplicate Job Overview page you will also find all finished runs of a scheduled job, and you can process their results there.
Custom Cron jobs
When selecting a frequency for your scheduled job, one option is "Custom". If the Daily, Weekly or Monthly options aren't specific enough, you can enter a Cron String here to set a more specific running frequency.
Most Salesforce-supported cron values can be used, except for Salesforce's optional year value in a 7th parameter.
A Cron expression consists of 6 date/time parameters, separated by white-spaces:
<seconds> <minutes> <hours> <day_of_month> <month> <day_of_week>
Enter a parameter for each date/time option to set a specific schedule. Once the job is scheduled, the job information in the Scheduled Job Overview will show the schedule written out in words.


Notes for using the Salesforce-supported cron parameters
- Jobs cannot run more often than once an hour, so * cannot be used for seconds and minutes, only numbers 0 up to 59.
- Hours use 24-hour notation, e.g. 9PM = 21.
- Day_of_week starts counting at Sunday, e.g. Sunday to Tuesday = 1-3. SUN-TUE can also be used here.
- Day_of_month and day_of_week cannot both have a specified value. Enter a value or * for one, and ? for the other.
The Cron parameters
| Parameter | Allowed values | Allowed special characters |
|---|---|---|
| Seconds | 0-59 | none |
| Minutes | 0-59 | none |
| Hours | 0-23 | , - * / |
| Day_of_month | 1-31 | , - * / ? L W |
| Month | 1-12 or JAN-DEC | , - * / |
| Day_of_week | 1-7 or SUN-SAT | , - * / ? L # |
| Special character | Description |
|---|---|
| , | To delimit multiple values. For example 1, 5, 8 |
| - | To enter a value range. For example 5-8 |
| * | To specify all values. For example, * for the Month parameter means the job will run every month. |
| ? | To indicate "no specific value". To use for the Day_of_month or Day_of_week parameter, if you have entered a value or * for the other parameter. |
| / | To specify increments. The number before the slash specifies when the interval will begin, and the number after the slash is the interval amount. E.g. 1/5 for Day_of_month means the job will run every fifth day of the month, starting on the first day of the month. |
| L | To specify the end of a range (last). When used with Day_of_month, it takes the last day of the month, e.g. June 30 or February 28. When used with Day_of_week by itself, it will always take Saturday, but when combined with a weekday value, it takes the last day of that type in the month. E.g. 2L takes the last Monday of the month. Don't use a range of values in combination with L, as the results can be unexpected. |
| W | To specify the nearest weekday (Monday or Friday) of the given day. E.g. if you enter 20W, and the 20th is a Saturday, the job will run on the 19th (Friday). However, if you enter 1W, and the 1st is a Saturday, the job does not run in the previous month, but on the following Monday (the 3rd). |
| # | To specify the n-th day of the month. The number before the # specifies the day of the week, and the number after the # specifies the day of the month. E.g. 2#1 means the job will run on the first Monday of every month. |
Cron parameter information sourced from https://developer.salesforce.com/docs/atlas.en-us.apexcode.meta/apexcode/apex_scheduler.htm and adapted for use in Plauti Deduplicate
Cron String examples
Note that some of these examples can also be set using a Weekly or Monthly frequency instead of Custom.
Run the DC job at...
| 20 minutes past the hour, every hour | 0 20 * * * ? |
| 7 PM on the last day of every month (can also be set with a Monthly schedule) | 0 0 19 L * ? |
| 9 AM on the last day of December | 0 0 9 31 12 ? |
| The beginning of every hour on the last weekday of every month | 0 0 * LW * ? |
| 5 PM every Friday (can also be set with a Weekly schedule) | 0 0 17 ? * 6 |
| Each hour from 8AM to 2PM on Monday |
0 0 8-14 ? * 2 |
| Every 30 minutes between 8AM and 10AM daily. |
0 0/30 8-10 ? * * |
