Step 1 How to enable the Cross Object feature
- Navigate to the DC Setup page
- At Object Setup, navigate to the particular *Object* you want to enable Cross Object for.
- Go to the *Object* Settings menu and enable the Cross Object setting.

- Repeat these steps for every Object you wish to enable the Cross Object feature for.
Step 2 Configure Cross Object mapping
- Go to the 'Cross Object' tab in the desired *Object* settings.
- By default Duplicate Check has mapped the most logical fields between Account, Contact, Account, and Lead. If you want to map additional fields click on the 'Add Cross Object' button.
- Choose which fields you want to compare between the two different objects. You can map any field to any field.
DC can only add scenarios define fields. When using Lead to Contact, DC will always use the second object scenario, in this case, the Contacts scenario.
This is an example of Cross Object with a comparison between 'Account phone number' and 'Contact Business Phone number'. When running a Cross Object Job DC will return results based on the comparison between the 'Accounts Phone number' and 'Contacts Business phone number'.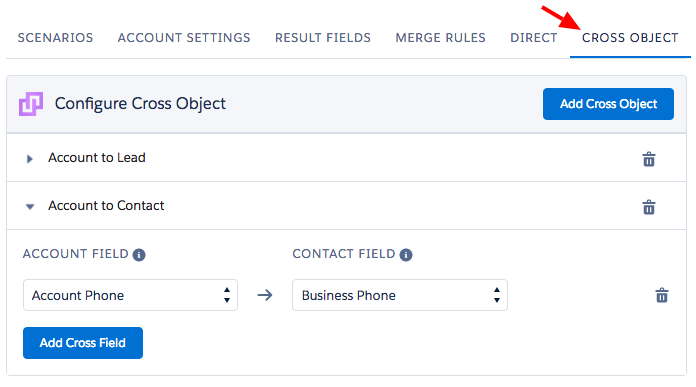
Watch this short video of how to enable and configure Duplicate Check's Cross Object feature.
